



-
Recessed Lighting Spacing for Kitchens and Living Rooms
Master the perfect recessed lighting layout. Learn how to space ceiling lights in your kitchen and living room to eliminate shadows and create the ideal ambiance.Read more -
4-Inch vs. 6-Inch Recessed Lighting: How to Choose the Right Size for Your Ceiling
Deciding between 4-inch and 6-inch recessed lights? Discover the best size for your ceiling height, room style, and lighting goals in this comprehensive guide.Read more -
2026 Lighting Power Density: Energy Code Compliance Path, Energy Codes (with LPD Calculator & 2026 Section 179 Calculator)
The latest 2026 Lighting Power Density (LPD) requirements. A comprehensive guide to energy codes for sustainable commercial lighting.Read more
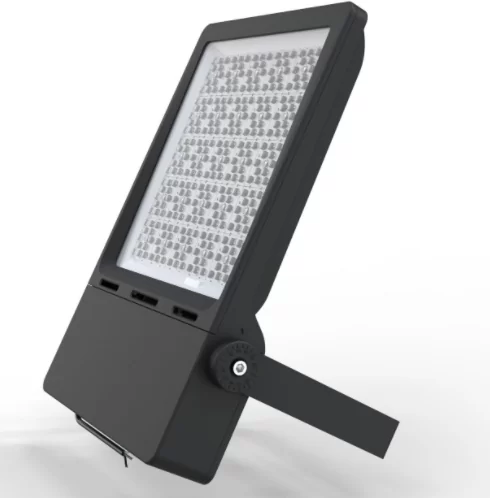
A Practical Guide to Modular Flood Light Maintenance
- 3 Jul 2024
Modularity in design offers a significant advantage for large-scale lighting: the ability to replace individual components instead of the entire unit. When a single LED module in a modular flood light fails, a systematic approach to replacement restores function quickly and maintains the system’s integrity. This process, when executed correctly, minimizes downtime and extends the overall life of the installation. We will outline the key steps for safely replacing a single LED module, ensuring your LED flood lights continue to operate effectively.
Initiating a Safe Power Disconnection
The first and most critical step is to ensure the complete electrical isolation of the fixture. This involves switching off the circuit breaker that supplies power to the LED flood light at the main electrical panel. Do not rely solely on a light switch. After cutting power, use a properly functioning voltage tester at the fixture’s connection points to confirm that no current is present. Working on a live LED flood light poses a serious risk of electric shock and can damage the components. This foundational safety measure protects both the personnel and the equipment during the maintenance procedure.
Accessing and Removing the Faulty Module
Once safety is confirmed, the next phase is physical access. Carefully remove the outer cover or lens of the LED flood light, which may be held by clips or screws. Inside, you will see the array of individual LED modules. Identify the specific module that has failed—it will typically be dark or show visible signs of damage. These modules are usually secured to the heat sink with screws and connected via a plug or terminal block. Undo the mechanical fasteners and gently disconnect the electrical connector. Avoid using excessive force to prevent damage to the surrounding wiring or adjacent LED flood lights in the array.
Installing the New Module and Verifying Operation
With the old module removed, take the new, compatible replacement module. First, reconnect the electrical connector, ensuring a secure and firm fit. Then, align the new module correctly onto the heat sink and fasten it with the provided screws, following the specified torque if mentioned. Before reassembling the fixture, it is prudent to restore power briefly to verify that the new module illuminates and functions as expected. After a successful test, disconnect power again to complete the reassembly by securely replacing the cover or lens, ensuring all seals are properly seated to maintain the ingress protection rating of the LED flood light.
Completing this process correctly ensures the longevity and reliability of your lighting investment. The modular approach inherent in modern LED flood light design underscores a commitment to sustainability and cost-effective maintenance. This method reduces waste by allowing for targeted repairs. The team at LEDIA Lighting designs its modular systems with serviceability in mind, ensuring that maintaining peak performance for your LED flood lights is a straightforward and secure task.